Recording Microsoft Teams meetings has become an essential part of remote work and virtual collaboration. It allows teams to revisit discussions, share information with absent colleagues, and keep a reliable record of important decisions. With several ways to record a Teams meeting, choosing the right method depends on your device, tools, and workflow.
In this article, we’ll explore different ways to record Microsoft Teams meetings, including the built-in recorder, OBS Studio, Xbox Game Bar, mobile devices like the iPad and iPhone, and third-party screen recording tools. These options help users capture video, audio, and screen activity so that important information is easy to review, store, and share after the meeting ends.
Key Takeaways
- Microsoft Teams offers a built-in recorder with certain prerequisites and limitations.
- OBS Studio, Xbox Game Bar for Windows, iOS, and Android built-in screen recorders, as well as third-party apps such as Vmaker and Movavi, can be used to easily capture Microsoft Teams meetings.
- Various features are available depending on the recording solution selected to facilitate easy sharing & collaboration of recordings.
Using Microsoft Teams Built-in Recorder

Microsoft Teams offers a built-in feature to record meetings, capturing video, audio, and screen-sharing activities during a session. This recording feature is particularly useful for quickly saving and sharing meeting content within the same organization. Only users within the same organization who have the required licenses (such as Office 365 or Microsoft 365) and the necessary permissions can start or stop a recording. Guests do not have permission to record meetings, and only authorized users can manage recordings.
However, the built-in recorder does have certain shortcomings, which are outlined in the subsections below.
Prerequisites for using the built-in recorder
The built-in recorder in Microsoft Teams requires specific Office 365 licenses like Enterprise E1, E3, or E5 and must be activated by your IT admin. Additionally, you should be the meeting organizer or a member of the same organization to initiate or terminate the recording.
Guests and participants from other organizations cannot use the built-in recorder. In such cases, they must resort to external screen recording applications to capture the meeting content.
Starting and stopping the recording
Initiating a recording in a Teams meeting is simple. Follow these steps:
- Click the “More actions” button in the top right corner of the Teams window.
- Select “Start recording” from the options listed.
- A notification will be displayed, notifying everyone that the recording has begun. A red icon or timer appears at the top of the screen to indicate that recording is in progress.
- All participants will be notified of the commencement of the recording.
Keep in mind that covertly recording a Teams meeting or a channel meeting without participant notification may violate privacy policies and is not advised. To stop the recording, click on the red icon or the dock button.
Once the recording has stopped, it will be stored in either OneDrive or SharePoint, depending on the meeting type. The meeting organizer can then share the recording with other participants or edit its expiration date.
Limitations of the built-in recorder
There are certain limitations to the built-in recorder in Microsoft Teams. It does not capture all meeting elements, such as the meeting chat, and guests or participants from other organizations cannot use it. Furthermore, the recording will automatically cease after four hours if a user does not exit the meeting.
To overcome these limitations, you can consider using alternative methods for recording Teams meetings, such as OBS Studio, Xbox Game Bar, or third-party screen recorders.
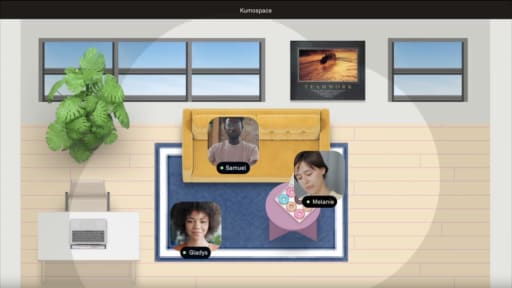
Expanding Virtual Interaction with Kumospace
Kumospace enhances virtual team interactions by providing a spatial online environment for more organic and dynamic conversations beyond structured meetings. Offering a virtual setting where users can freely navigate and engage in spontaneous discussions, it complements formal platforms like Microsoft Teams by facilitating a varied range of interactive experiences.
This integration ensures teams enjoy both structured and casual communication in the digital workspace, catering to varied interaction needs.
Recording Teams Meeting with OBS Studio

OBS Studio is a free and open-source software that enables users to record their Microsoft Teams meetings with ease. It offers a versatile screen recording solution that can capture all types of media, including video, audio, and screen content, as well as screen-sharing activities in high quality.
The subsections below guide how to download, install, and set up OBS Studio to record Teams meetings.
Downloading and installing OBS Studio
You can download and install OBS Studio by visiting the official website and following the instructions available there.
Ensure you download the version of OBS Studio that is compatible with your operating system (Windows, macOS, or Linux). Once the download is complete, initiate the installer and follow the on-screen instructions to complete the installation process.
Configuring OBS Studio for Teams meeting recording
After installing OBS Studio, follow these steps:
- Open the application and use the menu to navigate to the “Sources” section.
- Click on the “+” button and select either “Display Capture” or “Window Capture,” depending on your preference.
- Choose the Teams meeting window as the capture source.
- Adjust the settings and position of the capture source accordingly.
To start recording, click on the “Start Recording” button in OBS Studio. When you wish to stop recording, simply click the “Stop Recording” button. The recorded video can be saved in a location of your choice on your computer.
Using Xbox Game Bar for Windows
Another option for recording Teams meetings on Windows is the Xbox Game Bar. This built-in Windows feature allows you to secretly record meetings without notifying participants.
The subsections below guide you on launching the Xbox Game Bar and finding the recorded video.
Launching Xbox Game Bar
Pressing the Windows key + G on your keyboard will launch the Xbox Game Bar. Once the game bar is open, you can click the “Record” button to commence recording the Teams meeting.
Please remember that teams meeting secretly to record a Teams meeting without participants' knowledge is not recommended and may violate privacy policies.
Locating the recorded video
Once you've recorded the Teams meeting using Xbox Game Bar, the recorded video can be found in the Captures folder on your computer. The default location for this folder is C:\Users\User-name\Videos\Captures.
With recording enabled, the recorded videos can be accessed, shared, or edited as needed.
Recording Teams Meetings on Mobile Devices

Recording Teams meetings on mobile devices, such as smartphones and tablets, is also possible. Both iOS and Android offer built-in screen recording features, and third-party apps can provide additional options. For example, on an iPad you can open the Control Center, enable screen recording, and choose whether to include microphone audio before starting.
This section outlines the main options for recording Teams meetings on iOS and Android devices.
iOS built-in screen recorder
iPhone or iPad users can use the built-in screen recording feature available on iOS 11 or later versions to capture Teams meetings. Once you start recording, the video will be saved to your device's photo gallery in the videos section.
The recorded Microsoft Teams meeting can be accessed, shared, or edited through the Photos app on your iOS device.
Android built-in screen recorder and third-party apps
The built-in screen recorder on Android 11 or later versions can be employed by Android users to capture Teams meetings. For devices running earlier versions of Android, third-party apps like Mobizen offer screen recording capabilities. After downloading and installing the app, follow the instructions provided to initiate recording and adjust the recording settings for optimal results.
The recorded video can be saved to your device or a cloud storage service, depending on your preferences and the app's capabilities.
Utilizing Third-Party Screen Recorders

For additional features and flexibility when recording Teams meetings, third-party tools like Vmaker and Movavi are useful options. These screen recorders can capture all meeting elements and offer easy sharing and collaboration features. Some also support cloud recording, note-taking integrations, and simple options to manage or delete recordings.
The following subsections highlight the key features and benefits of Vmaker and Movavi.
Vmaker
Offering unlimited, watermark-free recording of Teams meetings, Vmaker is a cloud-based video recording and editing solution. With Vmaker, you can record system audio, microphone audio, or both simultaneously, providing flexibility in capturing meeting content.
Furthermore, Vmaker is free of charge and requires no payment information.
Movavi
Movavi Screen Recorder is a third-party screen recording software that also provides the option for covert recording of Teams meetings. It captures all meeting elements, including whiteboards, shared notes, and annotations, providing a comprehensive recording solution.
With Movavi, you can create tutorials, demos, presentations, and other types of video content in addition to capturing Teams meetings.
Summary
Recording Microsoft Teams meetings helps teams capture important discussions, review decisions, and share information with colleagues who could not attend. Depending on your device and needs, there are several ways to record a meeting, including the built in Microsoft Teams recorder, screen recording tools like OBS Studio and Xbox Game Bar, mobile screen recorders on iPad or Android devices, and third party tools such as Vmaker or Movavi.
Each option offers different features for capturing video, audio, and screen activity. While the built in Teams recorder is convenient for internal meetings, external tools can provide more flexibility and additional recording capabilities. By choosing the right method, teams can easily store, review, and share meeting content to improve collaboration and productivity.
Frequently Asked Questions
If you can't record your Teams meeting, it's likely because you don't have an eligible Office account or recording permissions. Recording must be enabled by your organization's administrator and you will need to request permission to record in Teams before you can start recording.
Only meeting organizers with an Office E1, E3, E5, and 365 Enterprise license have the ability to record meetings. External participants are unable to record unless enabled by Teams policy-based compliance recording.
No, guests or participants from other organizations are not able to use the built-in recorder in Microsoft Teams.
To access the recorded Teams meeting on your iOS device, open the Photos app to view the recording.
Vmaker offers more features and flexibility for recording Teams meetings, while Movavi is better suited to creating tutorials, demos, presentations and other video content. Vmaker is a cloud-based solution while Movavi is a screen recording and video editing software.